Screen recorders are very useful tools for creating high-quality tutorials, reference materials, and promotional videos. Whether it’s a tutorial video, a promotional video, or just a way to share how you work with your team, screen recording software can be an invaluable tool for any business.
It’s a very useful tool for YouTubers and for anyone who wants to create a video tutorial or a how-to video. Not only does it help to capture movements, but it also captures your voice via your microphone.
When it comes to utility tools, Wondershare is an industry leader. Their software includes tools for video editing, screen capture, file conversion, media conversion, and much more. If you’re looking for Mac software that will make your life easier, then Wondershare should be at the top of your list.
If you’re looking for tools to help with your screen recording, Wondershare has plenty of options. However, DemoCreator is one of the best screen recorder programs out there (by Wondershare).
We’re going to do a deep dive into DemoCreator. How easy it is to record, edit and add effects in videos, and then how to export them to share with the world. If you want to know every feature of the app, make sure you read this article all the way through!
What is Wondershare DemoCreator?
Wondershare DemoCreator is the best computer screen recorder for Windows and Mac. You can capture everything that happens on your PC screen, add voiceover to create a professional-looking video tutorial for YouTube, software demo video to promote your software or capture video from games and Skype conversations.
In short, Wondershare DemoCreator is an all-in-one tool that lets you record, edits, and export your video content. With its beginner-friendly interface, you can learn how to use the software in minutes.
From recording meetings and marketing events to creating tutorials and animated videos for your social media marketing campaign, Wondershare DemoCreator makes it incredibly easy to capture visually appealing content.
Wondershare DemoCreator is not just a screen recorder, but also a powerful video editor. You can insert texts, images, annotations, transition effects as well as edit the length of the recording as you like.
How to Record Video Using DemoCreator on Windows 10?
As I said, DemoCreator is the best screen recorder for Windows 10 so now, I will show you the step-by-step procedure to record the video.
It’s very simple and easy-to-use software. Follow these three steps, and you will be on your way to recording your video with the DemoCreator:
- Select Mode
- Adjust Settings
- Start Recording
1) Select Mode
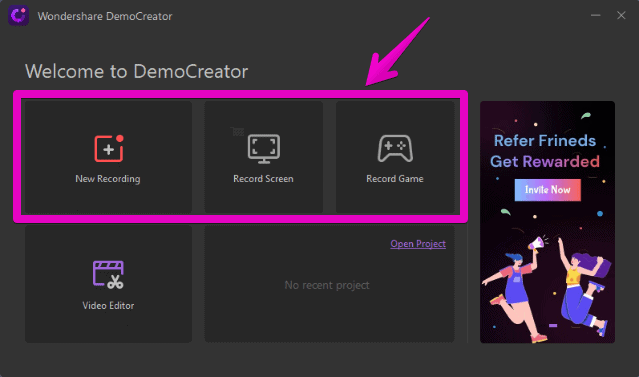
DemoCreator added 3 different modes in its latest version to capture your screen. These are given below:
- New Recording
- Record Screen
- Record Game
1) New Recording
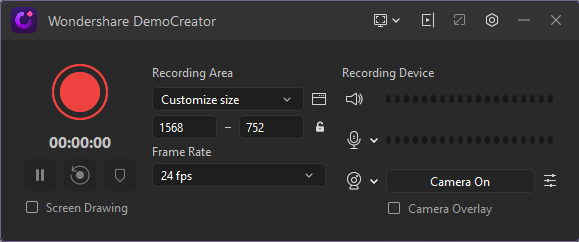
In the new recording option, you have full control over all the recording functions like screen recording, frame rate, record webcam, record audio, and screen drawing tool.
You can change the frame rate from 15fps to 120fps. With the help of a screen drawing tool, you can draw shapes, highlight objects, show arrows, and so on.
You can only record audio without recording the screen. In short, you can create a complete video project with this option.
2) Record Screen
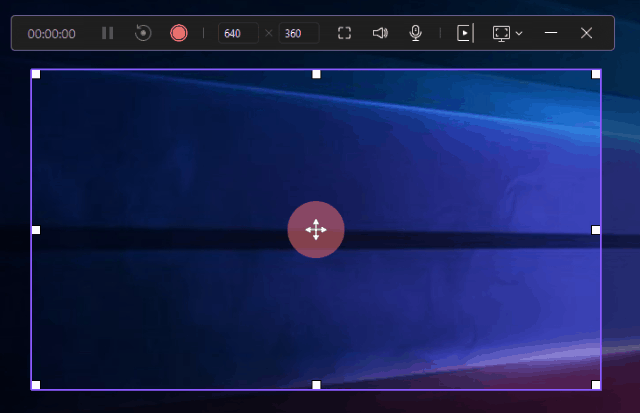
In the record screen option, you can only record video with microphone audio and system audio. You cannot use a webcam in this option.
You are unable to use screen drawing tools in this recording option. This option may be good for you if you want a simple screen recording.
3) Record Game
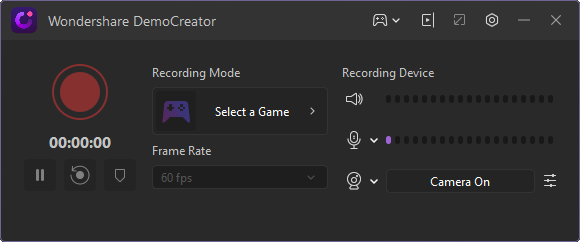
This recording option is specially designed for gamers who want to record wonderful and amazing moments of the game.
All you need to do is select the game and other sound settings, you’re good to go. Additionally, with this option, you can set the frame rate and enable the webcam while recording game moments.
2) Adjust Settings
After selecting the recording mode, you have to adjust the settings according to your taste, such as the recording area, i.e. full screen or a specific area.
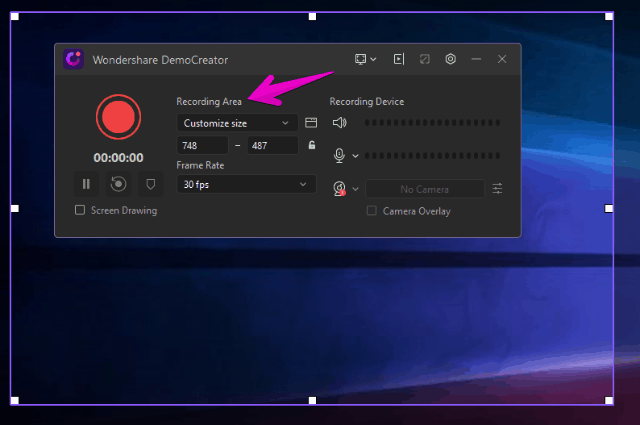
Adjust webcam, frame rate as well as audio devices according to your environment. After making all the changes, you are now ready to start recording your screen.
3) Start Recording
The final step is to start recording your video. You can record tutorials, software demos, how-to guides, lectures, and much more stuff like that.
During a video recording, you can draw the attention of the viewer to a certain object by using a screen drawing tool.
How to Edit Your Screen Recording?
DemoCreator screen recorder has a built-in powerful video editor by which you can edit your recorded video like a pro. Now, we will explore its editing tools one by one.
1) Edit Audio and Video Separately
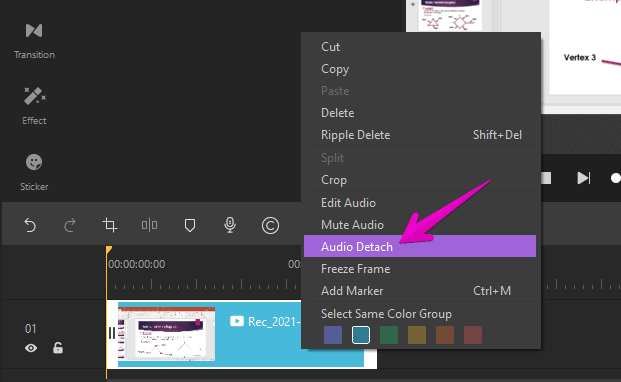
You can easily separate the audio from the video and edit it. DemoCreator allows you to edit system sound, microphone sound, and video in different tracks. To separate them, just right-click on the video and select audio detach
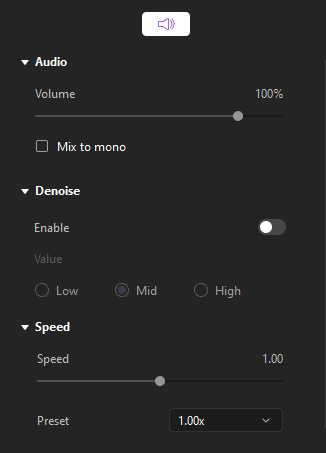
Now if you choose an audio track, audio settings like volume, Denoise, speed, etc. will appear on the right side.
Similarly, settings regarding video such as scaling, rotation, speed, etc. will appear on the right side if you select the video track.
2) Split, Cut and Crop the Video
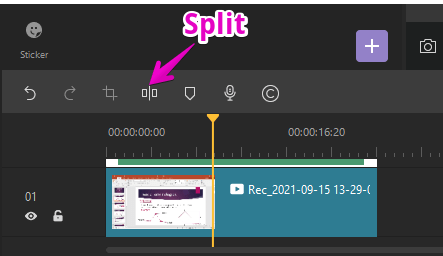
To split the video into parts, just place the playhead before the section you want to cut and click on the scissor icon to split it into two parts.
To cut any split part of the video, just select that part and hit the delete key from the keyboard. That specific section will be deleted.
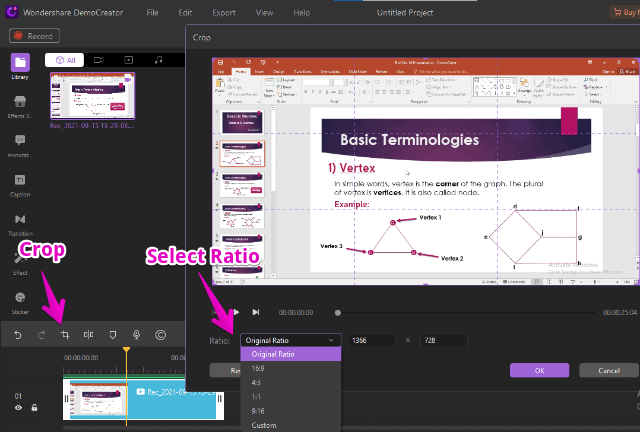
You can crop the video easily as well. Just click on the crop icon and on the popup window, drag the corners of the video according to your need to crop the video. You can adjust the ratio too.
3) Add Voiceover
You can add voiceover by clicking on the voice recorder. Select your microphone and start recording your voice.
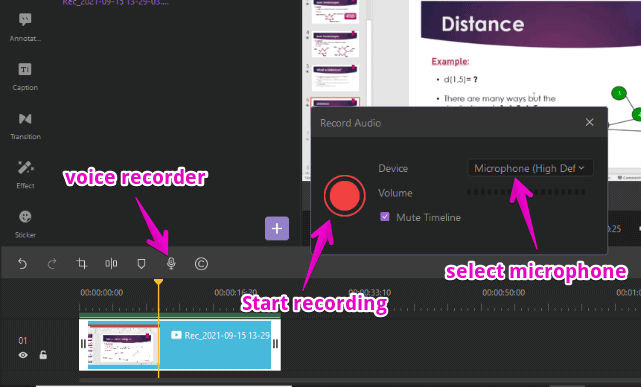
After recording the voice, it will appear in the timeline where you can edit and adjust it according to your need.
4) Add Brand Watermark
DemoCreator allows you to add your own watermark either in the form of text or image. To add your business watermark, click on the brand settings and the popup windows will appear. You can either add text or an image watermark.
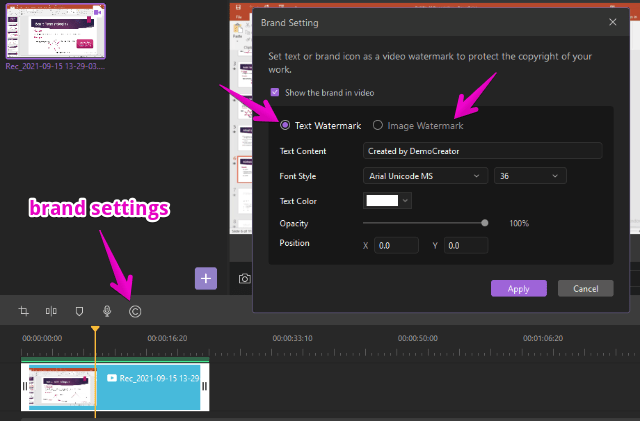
In the text form, you can change font style, color, position, etc. Image watermark allows you to adjust scaling, opacity, and position.
5) Rotate the Video
You can rotate the video at 360 angles as well. Just select the video track on the timeline and change the rotation settings on the right side.
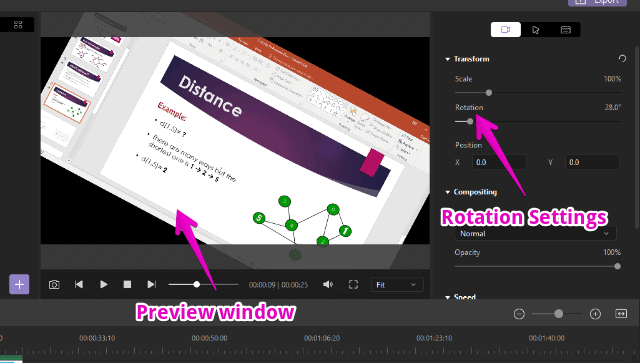
You can preview your video live. In this way, you can rotate your video to make it attention-grabbing.
How to Add Effects to Video?
Effects add beauty to video and grab the user’s attention. DemoCreator provides many video effects. Now, we will discuss them one by one.
1) Effect Store
DemoCreator added an effect store that contains numerous ready-made templates. On the left tool’s side, you will find the effect store option. There are categories of templates as well like popular, game, and creativity.
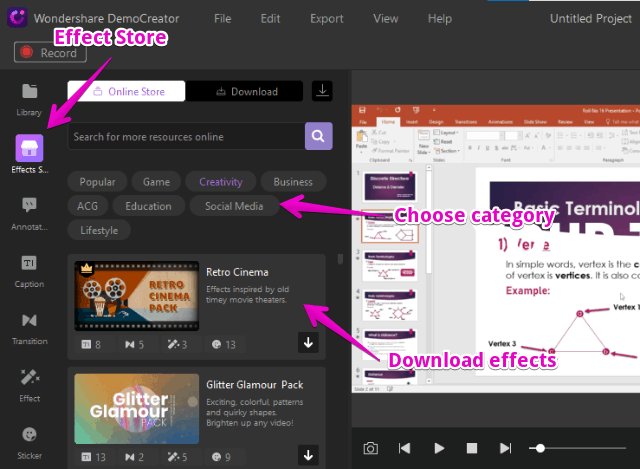
Download any template by clicking on the dropdown arrow. Then, you can use them easily. Some templates are paid; you need to upgrade to get those.
2) Annotation Effect
If you are recording a tutorial or any guiding video then, annotation is very useful and DemoCreator provides a variety of annotations. You will find the annotation tab on the left side.
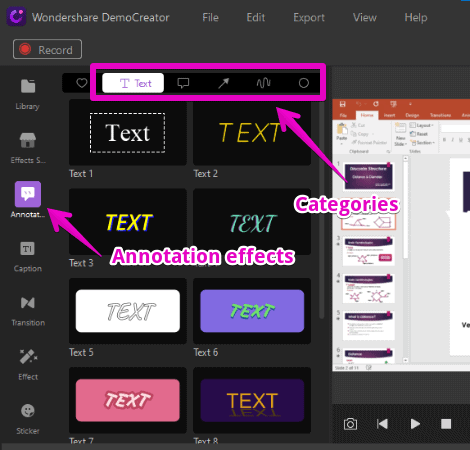
There are 5 types of annotations including text, dialog box, line, sketch, and shapes to choose from. Just drag and drop to add them to your video.
3) Add Caption
DemoCreator provides 4 types of caption effects which are the opener, end credit, subtitle, and lower third. Just drag your desired caption to your timeline and double-click on it to open the setting panel.
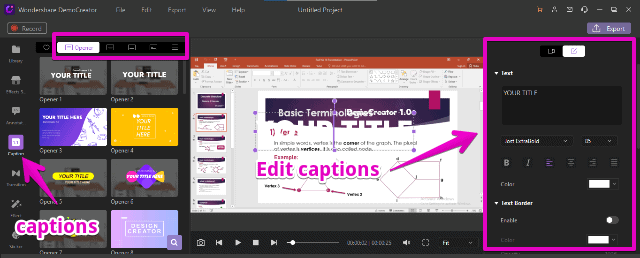
Type the content on the right side. You can change the typography as well.
4) Transition effect
DemoCreator comes with very useful and popular transition effects you can add to your recorded tutorial.
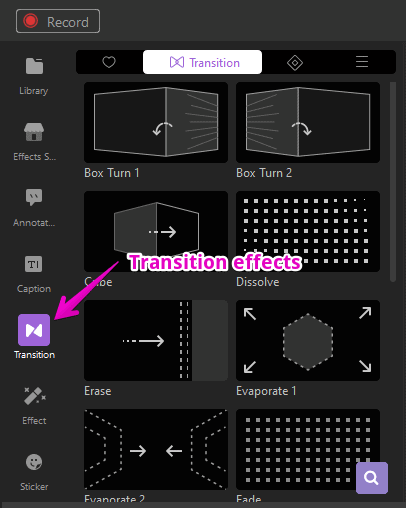
Again, drag and drop any transition effect to the timeline and adjust the settings.
5) Effects
This is one of the best features that DemoCreator provides. You can add amazing effects to your video like AI facial recognition, mirror, remove background, pan & zoom, etc.
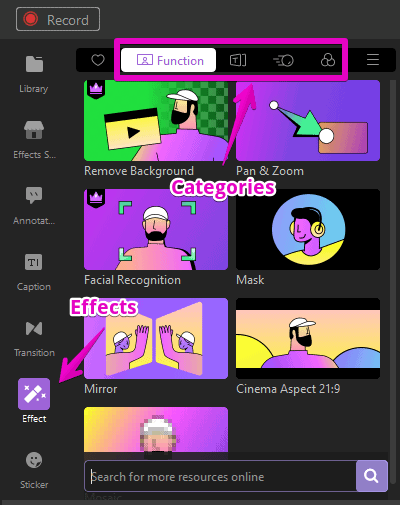
You have to drag them to the timeline and see the power of these effects.
6) Add Stickers
You can add various kinds of stickers and animations to make your video attractive. They are also categorized into groups i.e. animation, education, emoji, game, etc.
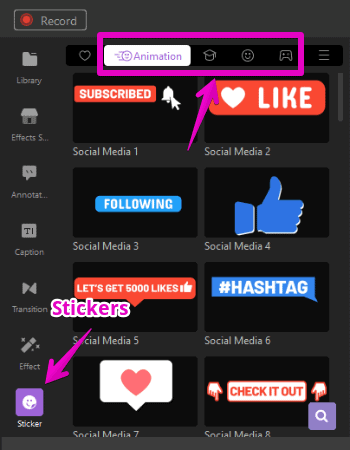
DemoCreator has provided so many stickers to choose from and adding more and more in its latest updates.
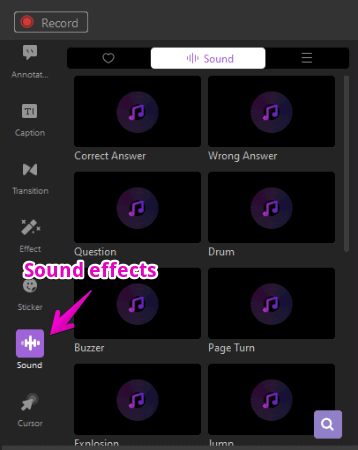
7) Sounds Effects
Similarly, you can add different kinds of sound effects. Add the desired one to the timeline and edit it. There are more than 15 commonly used sound effects to choose from.
8) Cursor Effects
You can add cursor effects to make your cursor stand out using highlights, click sounds, rings, spotlight, etc.
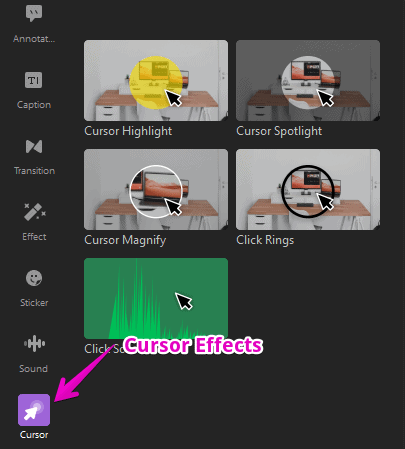
Place the playhead to the desired position and add the cursor effect.
How to Export Video?
After recording and modifying the video, now it’s time to showcase our video to the world. DemoCreator allows you to export the video in 3 ways:
- Export to different formats
- Export to cloud drive
- Export to YouTube
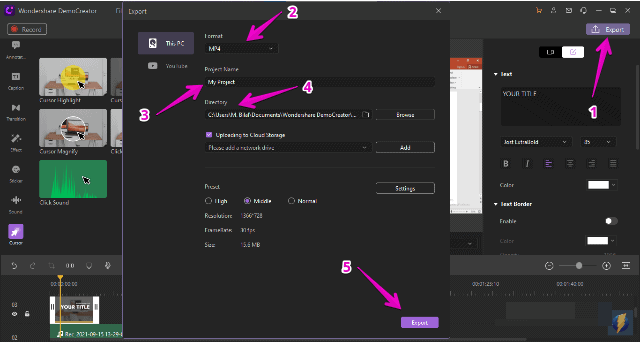
1) Export to different formats
We can export the video in many formats including MP4, MP3, AVI, WMV, MOV, and GIF. To export the video, click on the export on the top-right corner of the screen. Select the format, give it a suitable name, set the directory, and click on export.
The video will start exporting. The time will depend on the length and size of the video so, wait for it.
2) Export to cloud drive
We can directly export to any cloud drive as well. DemoCreator supports Google Drive, Dropbox, OneDrive, Box, pCloud, OneDrive for Business.
Under uploading to the cloud section, click on add then, choose your desired cloud storage. Then, it will ask for authorization to manage files.

After giving access, you will be able to export the video directly to your cloud storage account.
3) Export to YouTube
Instead of separately uploading the video to YouTube, DemoCreator facilitates the user to directly upload it after editing.
On the left side, choose YouTube and sign in with your account to share your video to YouTube.
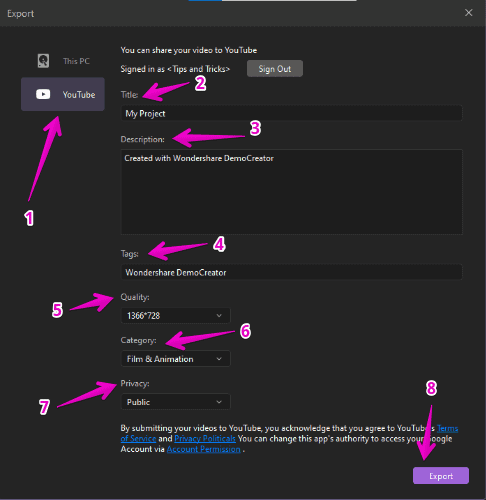
Now, you can make the changes after signing in. Write Title, Description, Tags, Quality, Category, and Privacy. Then, finally hit export.
Wrapping Up
Wondershare DemoCreator is an all-in-one solution to create amazing video tutorials, demos, presentations, etc. This easy-to-use and simple UI-based screen recording software will create eye-catching videos in minutes.
Its built-in video editor will make your task much easier. You don’t need to put an extra burden on your PC/Laptop by installing a heavy video editor when DemoCreator already has this built-in feature.