Do you want to organize your images and want to know how to make an album on Imgur? Well! the process is as simple as it sounds.
More than 300 Million users use Imgur to host and share their images with others.
That’s a crazy number!
Online image sharing has become very simple now. Some people use social media and many users prefer image hosting sites to share pictures easily within a few steps.
As a result of its very rapid growth, Imgur has been rated as one of the most popular image hosting websites of all time.

User-friendly features make it appealing to people. We can easily share pictures with this platform.
You can easily identify your pictures’ categories by creating an album on Imgur if you haven’t categorized them yet.
However, some users have difficulty creating albums on Imgur, so I’m sharing a step-by-step guide on how to create Imgur album.
You can store multiple images on an album and sort them easily by creating an album. I will reveal two methods of creating Imgur albums on this incredible image host.
How to Make an Album on Imgur?
It’s not difficult to create Imgur album but only a few steps far.
After creating an album, you can share a whole album with others easily.
So, let’s dive into our topic.
Method 1: create Imgur album
Imgur provides several options for creating albums. In this method, we’ll use one of them.
Step-by-Step Guide On Imgur Make Album:
The following steps will guide you through the process on how to make an Imgur album:
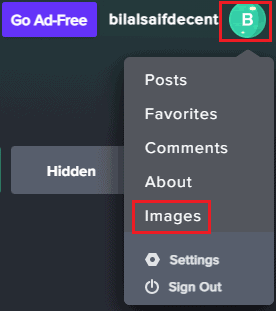
1) Click on your username > Images in the top-right corner.
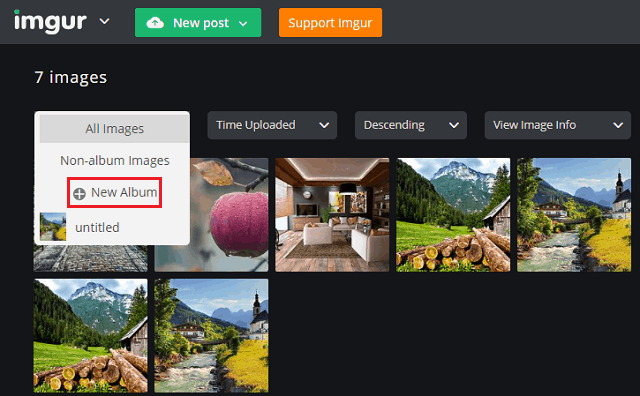
2) Click on All images > New Album
3) In a box that will appear, you’ll be asked to enter the title and description for the album as below:
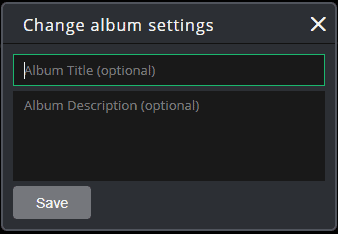
4) Enter the details and hit on Save
5) After that, click on Add images
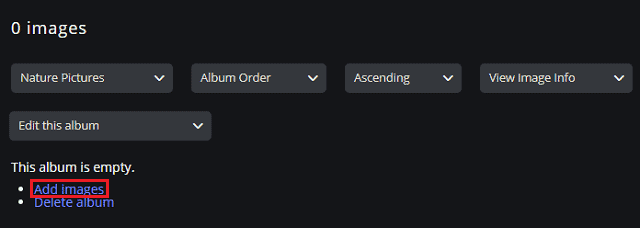
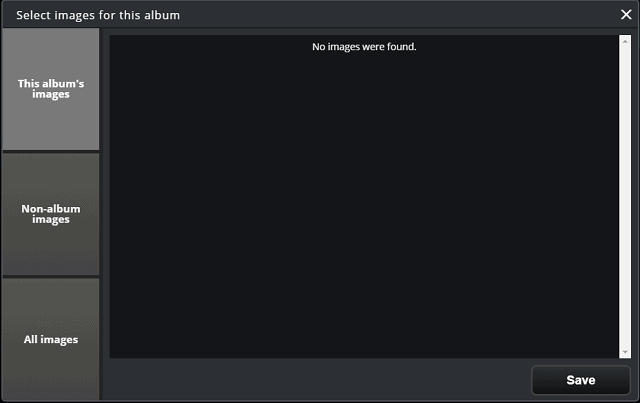
6) Now, you can select the images from Imgur and hit on Save.
7) That’s it.
What was difficult about it?
In this way, you can create Imgur album. It can now be shared with anyone and people on Imgur can also upvote it if it is public.
Note: The public status of an album means that it can now be shared with anyone and people can also upvote it and write comments too.
In addition, Imgur offers a hidden option, by which you can hide any post or image. Therefore, this option makes sense for many users since other users won’t be able to see that image.
This method is not working for you? Jump to the next method, which is very easy to use and is also known as drag and drop.
Method 2: Imgur create album
This is also the most effective way how to make an album in Imgur since we will use drag-and-drop for creating Imgur albums.
Sounds Good!
Step-by-Step Guide On Imgur Make Album:
To create Imgur album, follow the given instructions:
1) Log in to your Imgur account
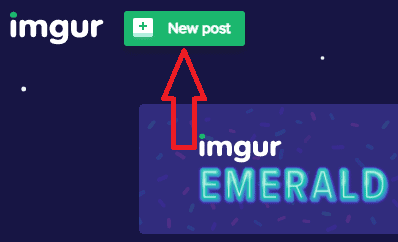
2) Click on New Post on the top. See the snap below:
3) Now, drag and drop all the images you wish to create an album to Imgur like below:
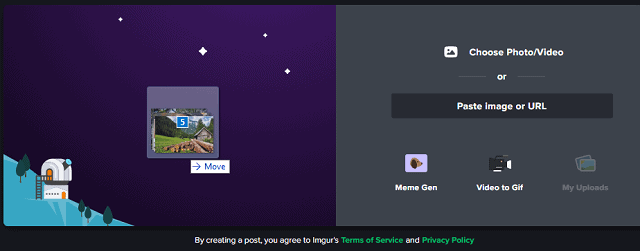
4) All the images will start uploading so, wait for some time. The uploading time will depend on image size.
5) That’s it, your album has been created.
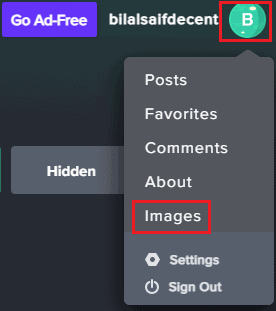
5) To see the album, just click on your profile > Images in the top right corner:
6) Now, hit on All Images > select the album named untitled. This is the album, we have created now.
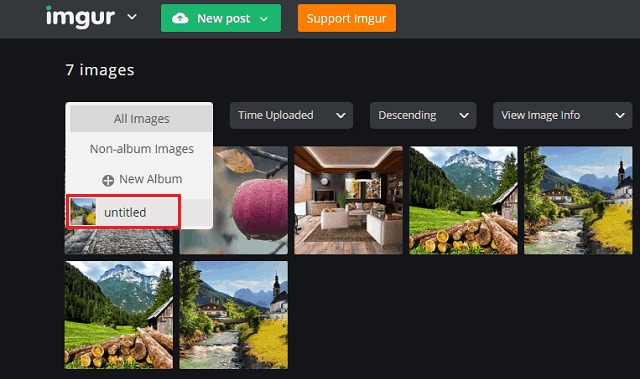
7) You will find all the images here, you have just uploaded
8) Congrats! you have created an album on Imgur
In my opinion, this is the easiest way to create the album because Imgur automatically creates the album once you drag and drop the images onto it.
This is an amazing feature. Isn’t it?
Using these two methods will surely work and anyone can follow this tutorial easily. With no worries, you will be able to create the album easily.
Now, I hope you have understood how to make an Imgur album.
How to Add Images to Album?
As of now, we have learned how to make an album on Imgur. We can also add images once the album is created.
Again, we have two methods to add images to the Imgur album. We’ll walk through each of these individually.
Method 1: Imgur Add Images to Album
In this method, I’ll walk you through how to add images to that album from your computer.
Jump to the next section if you already have images on Imgur that you want to move to an album.
To upload images to an album you have created, follow the instructions given:
1) Click on your Profile > Images in the top right corner.
2) Select your desired album
3) Click on the Add Images in the top-right corner:
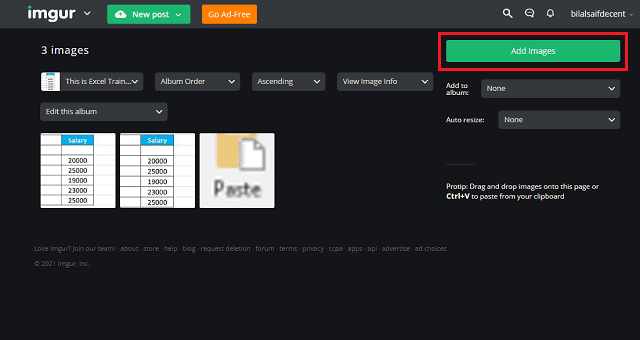
4) Now, drag and drop or simply browse your image.
In this way, you can add images to the Imgur album easily. Multiple images can also be added whenever necessary.
Method 2: Imgur Add Images to Album
If you have pictures on Imgur that you want to move to a particular album, you can read this section. There is also a facility to do this at this awesome image hosting site.
Follow the given instructions to move images to the album:
1) Select the album in which you want to move the images
2) Click on Edit this album then, select Add or remove images:
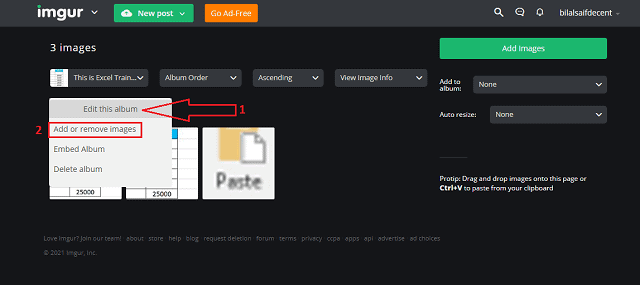
3) Now, Non-album Images on the left side, select the images you want to move, and click on Save.
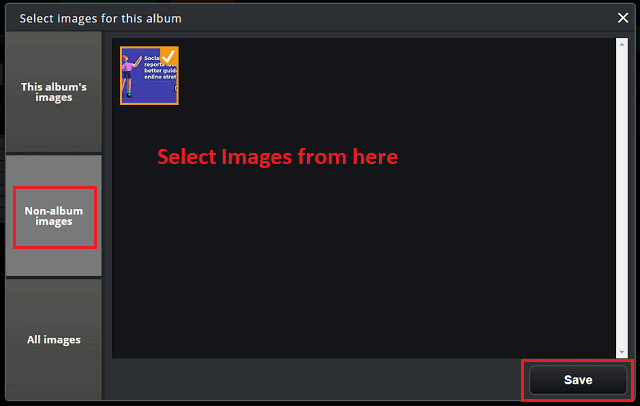
4) You’re done.
These are simple steps to move images to an album on Imgur. The same can be done here with multiple images being moved to the desired album at once.
How to View Hidden Albums on Imgur?
In addition, Imgur offers you the option to hide your albums so that they are not visible to the general public.
But the question is, how to view hidden albums? Well, this is very easy and a few clicks far.
An entire procedure for viewing hidden albums is given below:
1) Click on your Profile > Posts
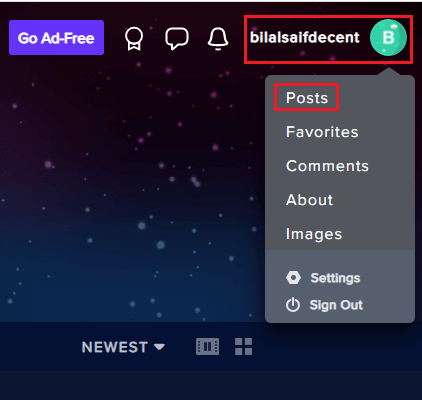
2) Navigate to the Hidden menu.
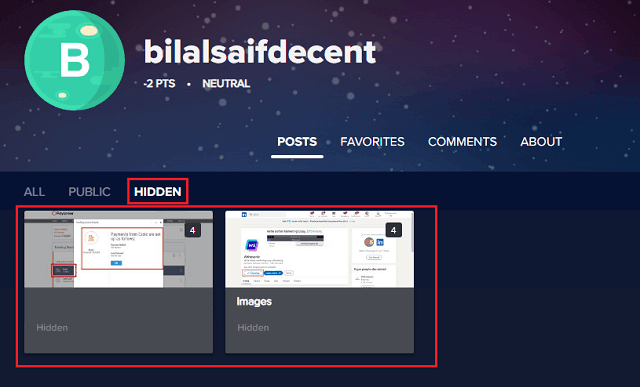
3) All your hidden albums will be listed here.
This is how to view hidden albums on Imgur. You can edit them and post them to the community as well.
Imgur Share Album: How to Share Imgur Album
We have created an Imgur album. Have you done it as well?
Now, it’s time to share it with others on social media sites or anywhere you want.
Follow the given steps to share with the world:
1) Navigate to your Profile > Posts
2) Go to the Public section
3) Open the album that you want to share
4) Click on share
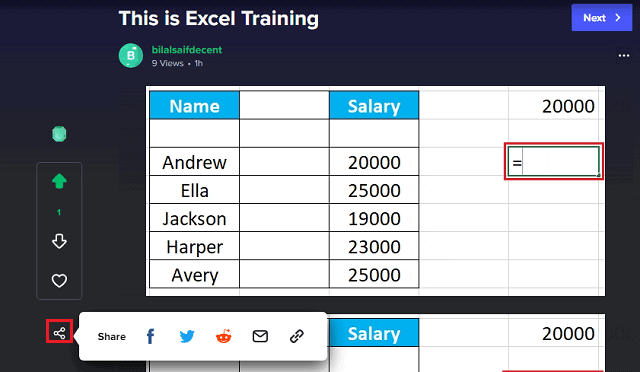
5) Here, you can share on Facebook, Reddit, Twitter, Email or copy the album link as well.
Here’s how to share an Imgur album to showcase your art to the world.
Download Imgur Album
You can download the Imgur albums as well in a few steps. Check out the 5 ways to download Imgur album which are 100% working.
For that purpose, follow the instructions given below:
1) Go to your Profile > Posts
2) Open any album that you want to download
3) Click on Three dots > Download
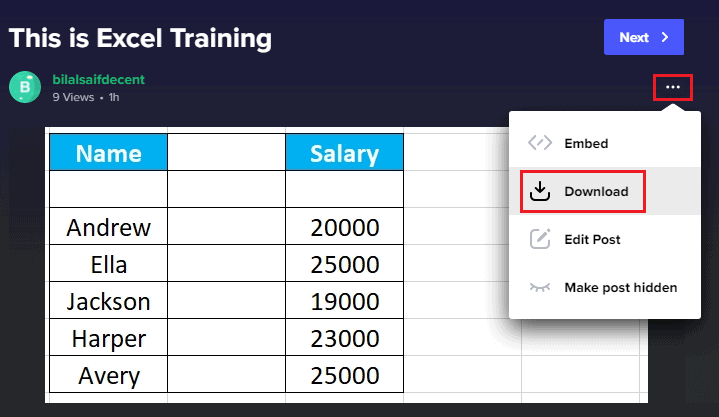
4) Your album will start downloading.
Frequently Asked Questions
How To Create URL for An Image?
Click on New Post, and drag and drop your image here. Give your image a suitable title and description. Then, click on Grab Link on the right side to get or create a URL for an image. Now, you can share links with others.
How to Grab Imgur Album Link?
To grab the Imgur album link, open your desired album. Hit on the share symbol on the left side and then, copy the link to the clipboard symbol. The Album link will be copied.
How to Delete Imgur Album?
To delete an album on Imgur, open your desired album. Click on three dots on the top right corner of the post then, Edit post. On the right side under IMG Tools, hit Delete post and your album will be deleted.
What Are The Best Imgur Alternatives?
Imgur is one of the leading image hosting platforms. However, here are 5 best good alternatives to Imgur:
1) Google Photos
2) Dropbox
3) Imgbb
4) iCloud
5) ImageShack
What’s The Size Limit Of Imgur?
The maximum size for the JPG or PNG file is 20MB. The size limit for GIFs or videos is 200MB. Imgur automatically converts PNG to JPEGs if the file size exceeds 5MB.
Conclusion
Due to the ease of uploading and sharing images, Imgur is one of the most popular image hosting platforms. Having learned how to make an imgur album, you are now ready to make your own.
Many social media platforms have upload limits, but Imgur solves this problem.
You can share a whole album as well to your friends, relatives, and loved ones.
I hope you found this guide helpful on how to make an album on Imgur. If so, then give your finders a move and share this guide with others too.


